Making eyes into default replacements is not that hard if you are in the know about exactly what to do. I originally made this tutorial for the lovely, wonderful, Pickpock and thought others might like it as well. It's 11 pages with pictures in Word. I know a great many folk don't have Word so I'll put the tutorial here.
0o0o0o0o0
Default replacements: the easy way!
For pickpocket @ insim.
What you need:
SimPE
DDXtools from Nvidia.com.
http://developer.nvidia.com/object/nv_texture_tools.htmlThe attached package files
The default replacement files for eyes are all “texture only” packages. Unlike other eye package files there is nothing but the single texture that you want to override the game’s texture with.
Here the name is vital. If you mess up the name of the texture then the game will not override its internal textures.
The alien default:
uuface-eye-alien_txtr
Brown:
uuface-eye-dkbrown_txtr
Dark Blue
uuface-eye-dkblue_txtr
Green
uuface-eye-green_txtr
Light Blue
uuface-eye-ltblue_txtr
Gray
uuface-eye-gray_txtr
Vampire:
emfacevampire-pale_txtr
(note this is part of a full-body layer that works like costume makeup.)
Now that you have the names you need to know what to do with them.
There are two ways to go about this process. The hard way is to make a copy of an existing eye that you like and remove everything except the texture. Then rename the texture to the name you want to override.
But first I’ll show you the easy way.
Open SimPE. (Deep breath, Deep…. It’s okay, you can’t break anything with this process. It’s safe.)
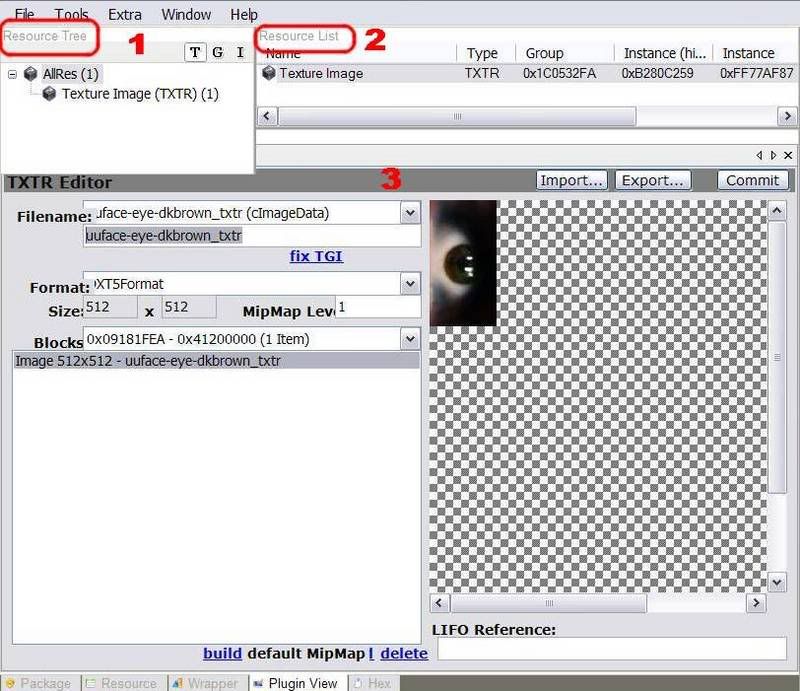
The main boxes of SimPE that you will need to use are:
1. The Resource Tree
2. The Resource List
3. The Plugin View
These should be up by default if not then go up to extras/preferences and choose reset layout.
To open the file you want to use select File/Open or use [ctrl]+O. Once the file opens you should see this:
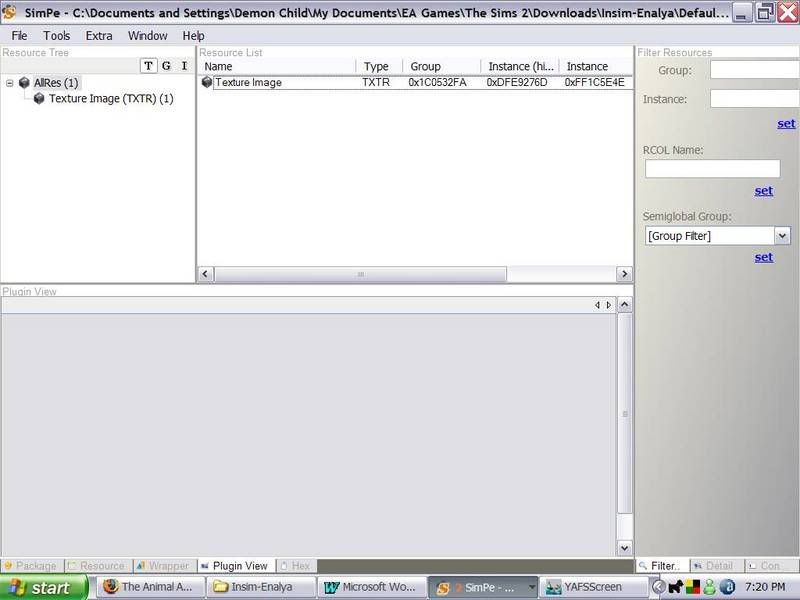
Click on the “Texture Image (TXTR)(1)” to sort the ‘resources’ (the parts that make up the package file). In this case there should only be the single Texture Image to deal with.
Then click on the “Texture Image” at the 2 area and once it loads you should see something like this (the brown eye default):
To do an easy replacement, locate a brow eye you like better and we’ll swap out the textures.
I’m going to use enayla’s new eye, “midnightness”
Since I’m doing a texture swap I need to keep the existing SimPE program open while I open up another ‘instance’ of the same program. To do this, just go to the existing eye package and click on it.
You’ll end up with this:
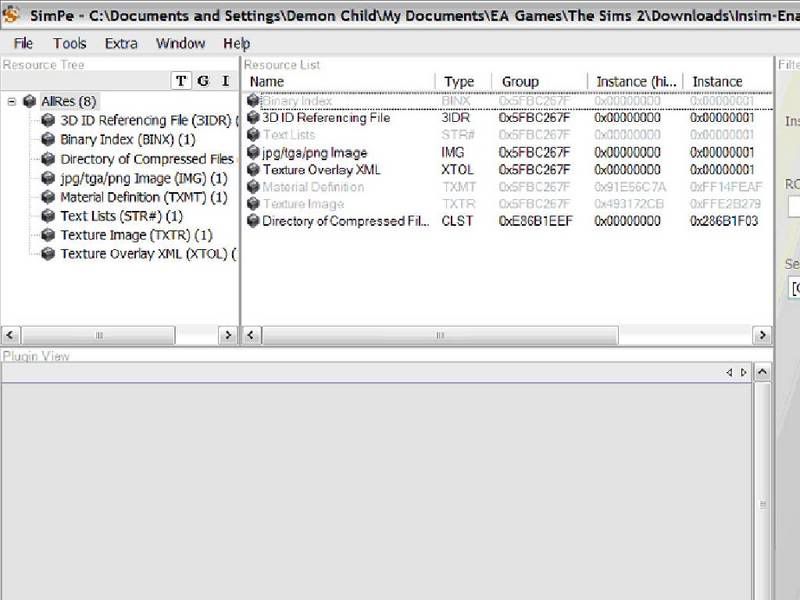
Look at all the ‘resources’!
This is why we need the resource tree. All we want is the texture.
Click on “Texture Image (TXTR)(1)” to sort the items in box 2.

Notice that once you do everything but the “Texture Image” disappears from that box.
Click on the remaining item and off click on the lower picture that appears.
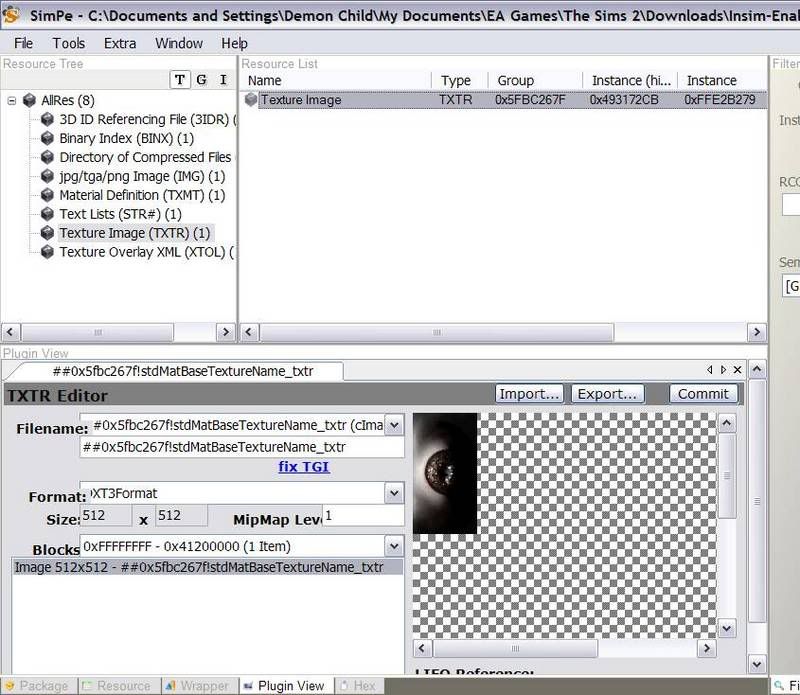
Off click on the image to bring up the menu. Select ‘export’.
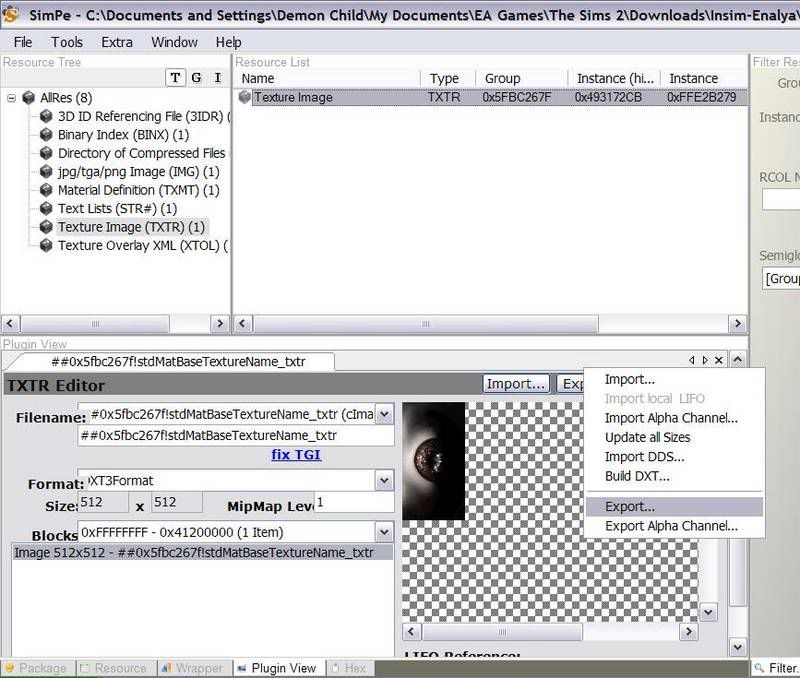
Now go back to the original default package. You have two choices here. You can “import” or you can “build DTX” (Build DTX only works if you download and install the DDS tools from Nvidia. Trust me, using build DTX results in a clearer crisper image in the final product than import and so most creators prefer to use it. Note: Installing the tools on your computer is not enough, you must go into extra/preferences/system folders and point SimPE to the installation location of the tools. Example: on my machine the tools are installed at C:\Program Files\NVIDIA Corporation\DDS Utilities.)
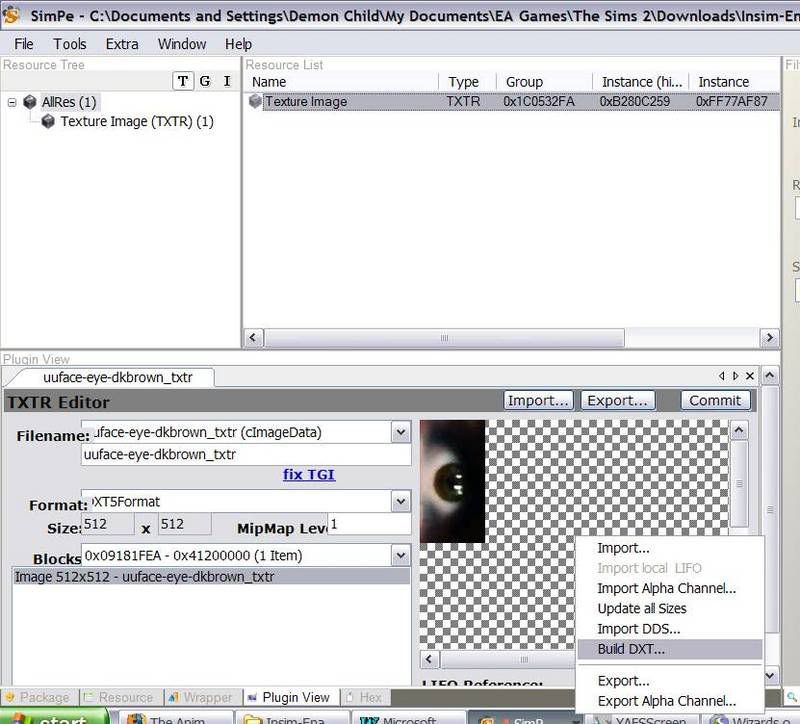
Because I don’t want to ruin Enayla’s quality work I’m using Build DXT.
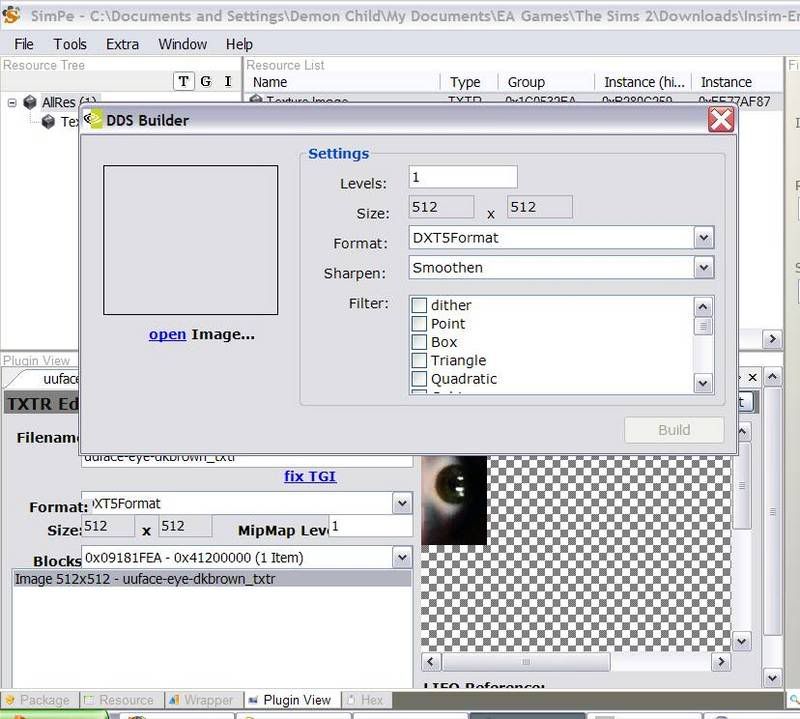
At this point I only want to “open” the image.
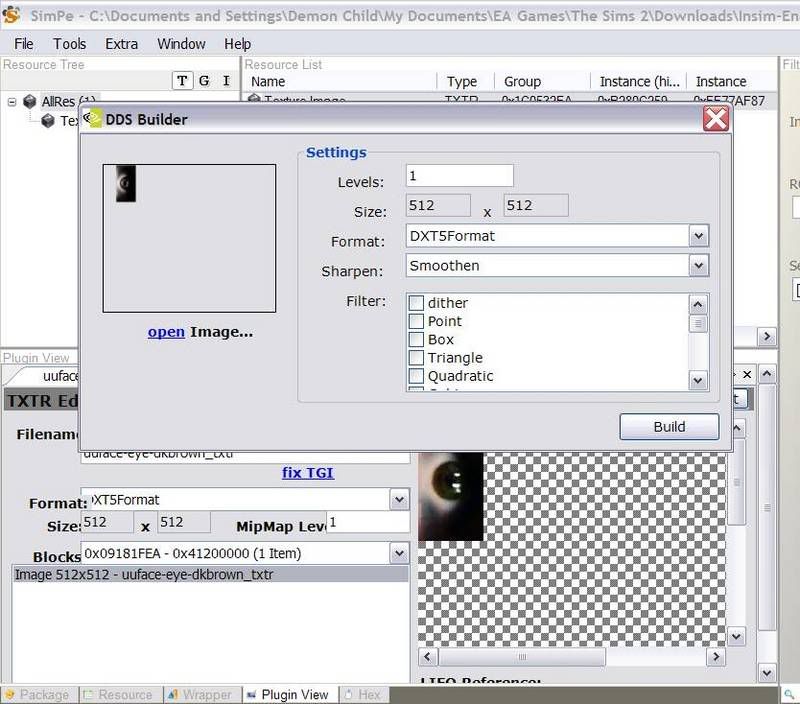
Once the preview shows up of the texture you want then hit “Build” The screen will pop up with a black box that looks a lot like a DOS prompt while the DDS utilities do their work.
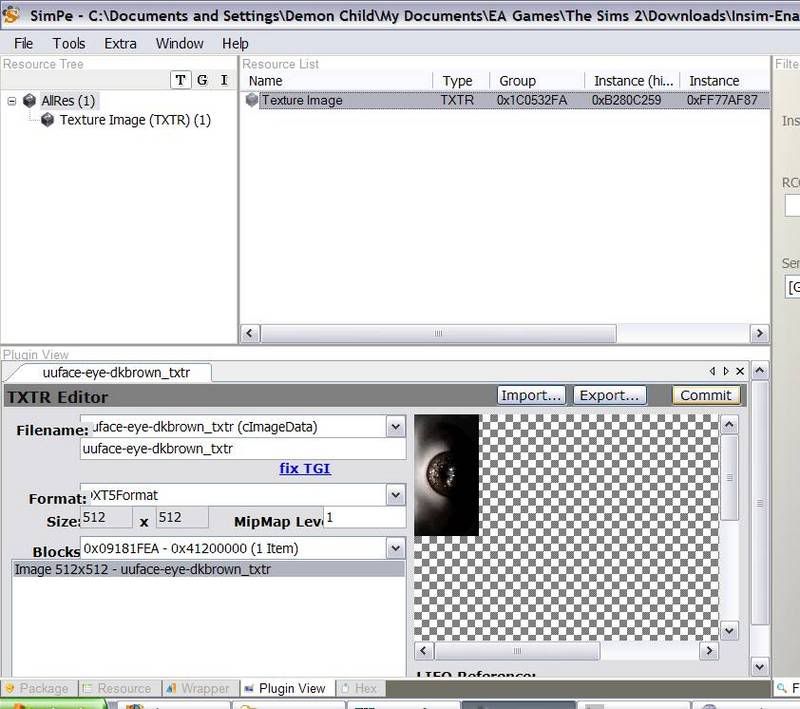
The final result. But we’re not done yet.
You need to “Commit” the changes or else SimPE won’t save them.
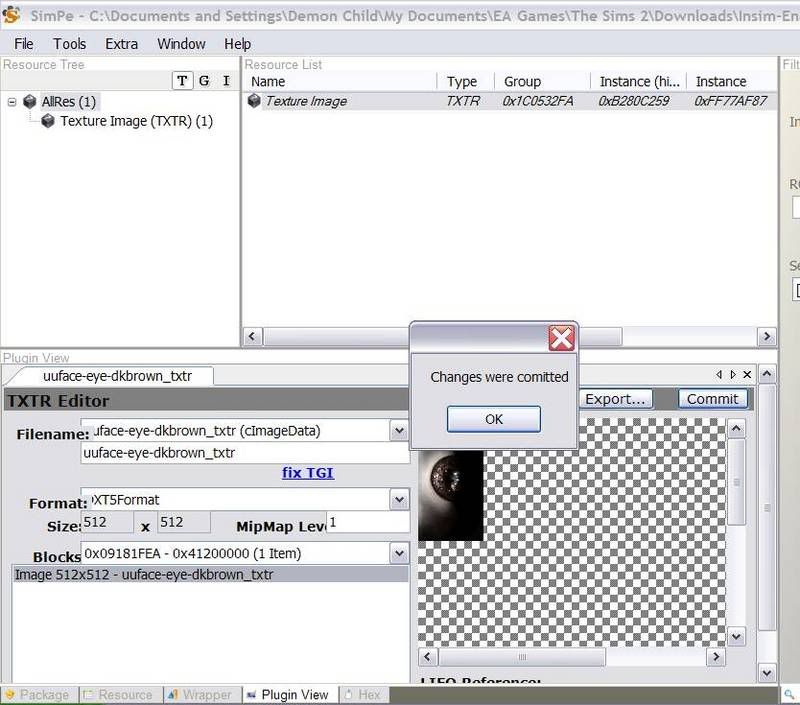
Hitting the “Commit” button calls up the little box there that informs you that indeed the changes have been accepted by the program. Almost done.
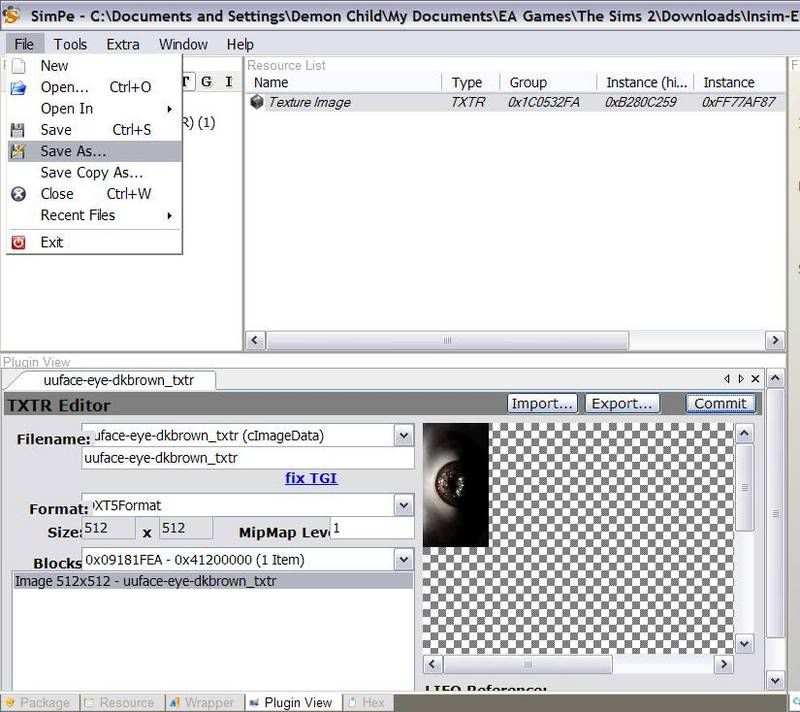
I usually do “Save As” at this point because it forces a rename of the file. This one went from “default-enaylaSoftBlack-browneye” to “default-enaylaMidnightness-browneye”.
All the basic eyes work the same. The only one that is different is the Vampire one.
Here I’m going to replace the eyes in my current vampire default skin (by Patches2sim) with one from Enayla.
Start with extracting the old texture with the eye you want to replace:
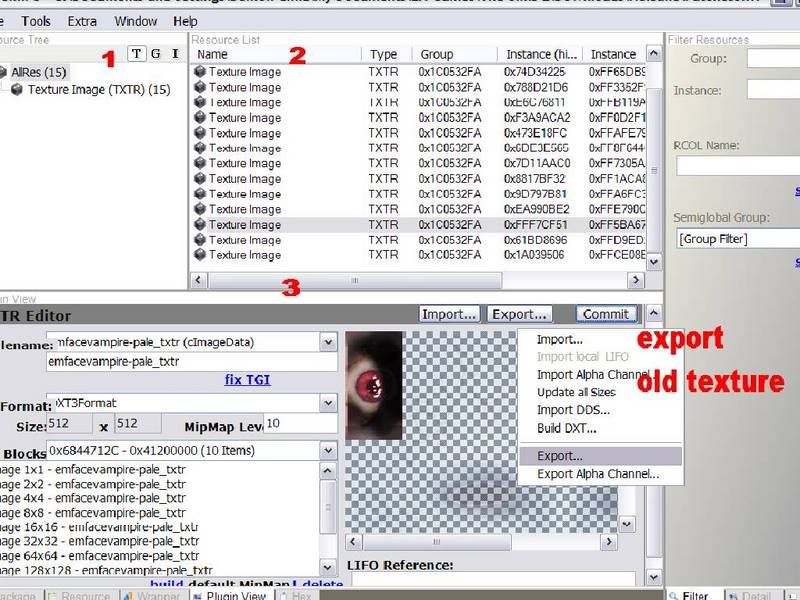
It doesn’t really matter what graphic program you are using. You may need to export both the texture and the alpha channel.
(If you want to replace the entire skin then you will want to extract all the alpha channels for all 15 textures.)
Now, you will need your eye texture. If you have a new or saved .bmp file that you have made yourself then you will only need the alpha channel we’ve extracted. Otherwise you need to open the eye package that has the texture you want in SimPE, just like before.
What I did was to open up my replacement texture and select the eye, copy it. Then I opened up the other texture for the face, pasted the new eye texture over the old one and saved it. Back in simPE I used Build DTX, then committed and saved.
You can do the same thing with your .bmp. Open it first in your graphics program, select the eye texture and copy it. Then open the exported file and paste your eye in place. Save it as a .png. The use “build DTX” to insert it into the package just like before.
Doing the entire skin would mean adding another step, “Import Alpha channel” to each of the 15 textures. But that’s another tutorial…
0o0o0o0o0
attached here are my default replacement packages that use enayla's eye textures. You may use these as a base for your own default replacement eye packages. If you use the vampire one please credit Patches2sim for the replacement alphas used in the body and face texture.

