my trick is to have all the ingame settings on high, then using gadwin to save screenshots as Tiff files (they come out in 1280x800).
after I'm done with picture taking, I open the pictures in photoshop, and sharpen them (after I'm done with all the other editing I usually do, like brightening and such).
I usually make a new layer of the background layer/edited picture and then put a smart filter on top - making the filters editable, then put a smart sharpen filter on top of it (usually with my own "standard" setting with amount 85 - radius 0,7. The other default sharpening tools you've got little or no control over, unlike smart sharpen).
How much sharpening depends on how good your ingame graphics are. You just have to experiment with how much you need. But if you start to see clear white lines around edges in the picture, then you took it too far. If you don't sharpen the printscreen pictures, they actually have a tendency to become a bit blurry when you resize.
after that, I adjust the image size with all the layers still there. It keeps the settings from getting lost - unlike if you flatten the layers before adjusting the size. (I also use the bicubic sharper function before clicking OK).
(a good idea is to now save the tiff file as a new file so that you both have the original and the edited file, just in case)
I then flatten the layer, and save as PNG. You can save as JPG too (use highest settings), and sometimes you have to do that - but keep in mind that JPG takes away picture information already in the first saving. If you save the same picture many times using JPG, especially if you use lower settings than the highest, it will in the end become blurry. PNG uses other ways of rezising the filesize, and won't do that to your pictures. The filesize is a bit bigger than JPG, but the quality of the picture is a lot better.
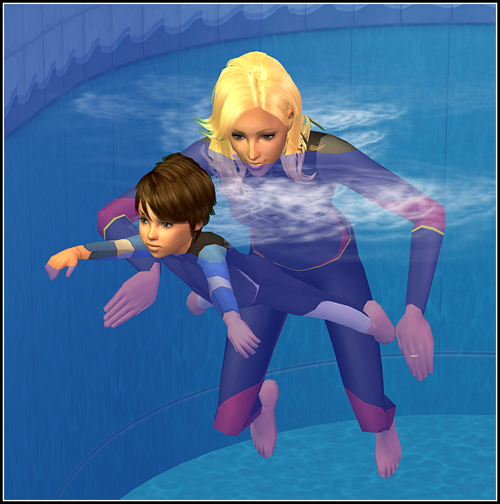
here's what I mean - you don't see it so good in the post, but if you look at them against each other (like save to desktop, and go through them there), you can see it very clearly:
my usual settings
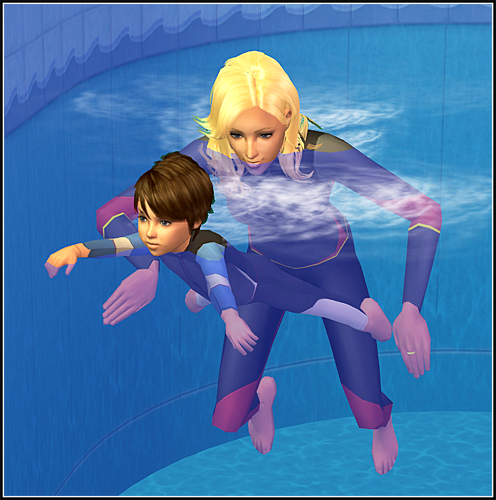
without smart sharpen (or without sharpening at all)

flatten layers before adjusting image size
the JPG with the highesst saving setting looked almost like the PNG one - but check what happens when I turn the settings to the lowest:

big difference, huh?
hope this (very detailed tip tutorial) helps


